Since I’ve completed the embroidered quilt, I’ve been focusing on prepping projects.
 I need 67 attic window blocks for the siggie swap during the Jane Stickle Quilt retreat in November. They’re prepped and ready to be sewn. I’ve cut extra fabric to make more blocks. Not all of my friends are participating in the swap and I want their signatures too. There are enough prepped pieces for 80 blocks. I thought an 8 x 10 block layout would be the easiest setting.
I didn’t buy fabric for these blocks but used from my stash. The top dark blue was leftover from a project many, many years ago and the other blue is from the embroidered UFO quilt I just finished piecing last week.
I have no idea where the top medium blue fabric came from. The middle one is another leftover from a project and the bottom fabric is from my mom’s stash. Muslin fabric is used for the signature section.
 The sashings for the Salinda Rupp/Nearly Insane quilt have been cut and sewn. I purchased the sashing fabric after the August Inspiration Club held at Pumpkinvine Quilting. (Designated fabric purchases are ok.) A soft yellow is the color I’ve gone with and I’m using the blue fabric leftover from Jane for the cornerstones.
The yellow shows lighter here than it actually is, but in the block photo below, it shows brighter than it actually is.

The side sashings have been sewn to block 1. The other pieces are pinned on the design wall. (I have to pin them in the summer because the ceiling fan blows them off the wall!)

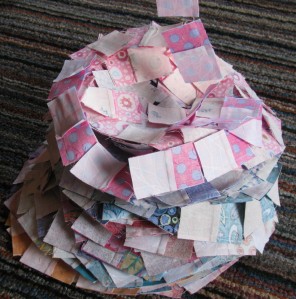
The 2-patches have been sewn into 4-patch blocks. They need to be pressed but they are the lowest priority project. I’m always intrigued when I chain stitch blocks, how they spill over the edge of my sewing machine cabinet, onto the floor and then drape into a beautiful swirl.
The 600 HST’s for the Cherry Blossom quilt are ready to go. There seems to be an overabundance of brown fabric. I’ll probably piece half of the block B’s and then decide if I need some color changes for the last bunch.
 The main focus these weeks has been on marking Jane so she can go in the quilting frame the first Saturday in September. But I decided not to wait until September and got her into the frame last Saturday.
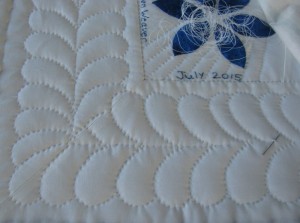
I used a very fine point blue marker to mark the quilting. It doesn’t show in the picture but it is dark enough for me to see when I quilt. The first thing I did was to baste stitch the outside edge. I had marked a line for this and when she is bound, I will lay the edge of the binding on the basting thread.
 My Jane has feather borders because I don’t like the scallops that were on the original quilt. I had originally planned to use a different feather stencil and she would have had a scalloped border but I changed my mind. I ran into Donna Kooistra at the AQS show in Grand Rapids and asked her thoughts (as a quilt appraiser) on my plan for the markings. She mentioned several things to take into consideration and one of them was the size of the feather compared to the pieced blocks. After I was home, I compared the quilting stencil to the pieced blocks and the feathers were too large in comparison. I bought several more feather stencils and this was the one that looked the best. So, the border is going to be straight, not scalloped.
I will be posting weekly progress on my quilting. I have no idea how long the quilting will take.
 I’ve been sewing the HST’s together for the Cherry Blossom quilt and I made 6 flannel receiving blankets for charity. I’m almost finished signing the siggie blocks then I have another hand project to start.


