Archive | March 2015

The Jane Stickle Quilt, Row I

IMG_5197When I was prepping the blocks for row I, I noticed that some of the blocks had many, many pieces to them, so I counted the pieces in these blocks.

The first block doesn’t look that complicated. Just a sweet innocent block . . . but it actually has 44 pieces in it! I added it up several times to make sure, yes it is 44. The next 2 blocks both have 41 pieces.

I was rather overwhelmed. Next row I’ll wait to count the pieces after the block is pieced.

I decided to get it over with and pieced these 3 blocks first. The rest of the blocks seemed easy and went fast after these guys.


IMG_5198


Here are all the blocks pieced,


And the whole row.

IMG_5199

Wow, I’ve actually pieced 4 rows in 4 weeks! If I can do 4 more rows in 4 weeks, I’ll have the center finished by the first of May. Once the weather actually warms up, I’ll have yard and garden work, until then I’ll just keep on sewing.

Pillowcases!

IMG_5191Our almost three-year old grandson has moved out of the crib and into a big boy bed so I decided to make him a pillowcase to celebrate. It was so much fun to just sit and sew something and have it completed in an hour, that I decided to make pillowcases for the rest of the grands.

They’re all completed. I think it will be awhile before I make pillowcases again but they did turn out cute.

IMG_5193The pillowcases were all made using the magic pillowcase method. I hope the link works, the lady started talking right away.

IMG_5196The last of the Amaryllis are blooming now. The 2nd flower stalk of both red Amaryllis have now opened. The white one has both stalks blooming at the same time. I’ve noticed as the season as progressed, the interval between flower stalks blooming has lessened. I’ve placed a sticky note in the calendar on November as a reminder to pot up the bulbs earlier in the fall. I’ve got to have a note as a reminder or I’ll forget all about it!

The Jane Stickle Quilt, Row H

IMG_5185I try to prep a whole row at a time when working on Jane. I lay the pieces for each block on this large cookie sheet in order but I don’t necessarily sew them in order. I divide the piecing process into 3 sections.


1. Blocks that are appliqued or need some applique before piecing. 2. Blocks that need some sewing then applique. 3. Blocks that are completely pieced (the applique/pieced blocks join the pieced blocks when the applique is completed).

IMG_5186


The applique blocks go on a separate tray and are taken downstairs to be hand sewn in the evening.


IMG_5188


The row H blocks have been completed.


The start of the bottom part.

IMG_5189

Spring is Slowly Coming

IMG_5180Spring is slowly making her way into northern Indiana. The neighbors have buckets hanging on the maple trees to collect sap.

The white pails are hard to see against the snow background.

Most of the snow has melted and I can see the roadside trash that needs to be picked up. Daffodils have started emerging from the ground and the skunks have emerged too!

When I walk down to the road in the early morning to get the newspaper out of the box, I often hear the male cardinal singing to his mate, if I’m lucky, I’ll see him too. The other morning I could hear a killdeer in the bottom pasture field calling and another bird from the neighbors farm, crying in return. We’ve had bluebirds sitting on the fence and the other day in town I saw robins hopping around in a yard.

The garlic is waiting for a little more warmth before completely waking up. I’m glad I decided not to plant peas this year, the garden isn’t fit for planting.

IMG_5184

I have taken the time to sew the buttons in the center of my pincushions. Don’t they look better? I just used regular buttons from my button tin.

I’m still working on my Red Radiance embroidery project too. I’ve completed 3 of the 4 borders. I hope to get the embroidery completed before we start field work this spring.

The Jane Stickle Quilt, Row G

IMG_5176With the completion of row G, I have half of the blocks pieced for the center section of my Dear Jane quilt.


Row G is the very center row. I will be sewing the following rows onto G and then sew to the top half.

IMG_5177

I’ve become rather boring in reporting on these rows but I’m still excited about Jane. I am actually piecing this challenging quilt!

IMG_5178


Block G4 was ‘fun’ to piece. It is all foundation paper pieced. I remember my first foundation paper piecing project back in 2007; I have come a long way since then. I will never be nervous about foundation paper piecing again thanks to this quilt.


IMG_5179Block G7 was the last block I pieced for this row. I pushed it back because I thought it looked hard; diamonds and inset seams, oh my! But it wasn’t hard, I just paid attention and it went together fine.


Now, onto Row H!

Amaryllis Care in the Summer

Since I’m only working on 2 quilting projects, I haven’t been posting as much. I’ve had several of you e-mail me and ask me about how I care for the Amaryllis’ when they’re not blooming. Thanks for the interest, and what a great idea for a post!

For the rest of the winter, keep on like you are doing now. Cut off the dead flower stalks and keep the plants watered, but don’t overdo it. I keep mine in the house until maybe the first of May (sometimes earlier if it is really warm), then I set them outside by my back steps. If temperatures lower than 40* threaten, they are moved back into the house.

When there is no long a threat of frost, I normally transplant them into a flowerbed, but this year they are going to be planted in the garden. Before planting, I trim the leaves to about 6″ from the bulb. I do this because the plant isn’t “hardened” and the leaves aren’t able to stand up to the wind. Don’t worry, they will grow more leaves.

I dig an individual hole for each bulb big enough to hold the dirt from the pot. I do loosen the soil from the potted roots so the roots are free somewhat, but I try not to disturb them too much. Sometimes though, no matter now careful I am, all the soil falls off the roots. Just put the roots in the ground and place the potting soil with it. Push the bulb into the soil and pull real dirt around the bulb until just the tip is sticking out, then I mulch them. You can use whatever is available and whatever you like to use, but please mulch them. Mulching helps hold the moisture in the soil. When the mulch is in place, I give them a good drink of water. I’ll water them every couple of days for a week or two. If it rains, you don’t need to water that day.

If any baby bulbs have fallen off during the planting, go ahead and plant them too but be sure to mark the spot with a stick or something so you can see where they are.

Keep an eye on them over the summer, but they are very self-sufficient.

When fall comes, keep an eye on the temperature. When frost threatens, loosen the soil around them and get them out of the ground. I rinse the roots in water, removing all the soil, then I like to lay the plants on my garden wagon (slotted frame) and leave them there to dry. I don’t cut off the leaves. I set the wagon in the garage and let them dry until usually the middle of November. By now the leaves are all dried up. I cut the leaves off with a scissors and place them in a basket, then store them in the cellar until I start potting them in December.

You will need to adapt this method to your growing area. We’re in the very northern most part of Indiana.

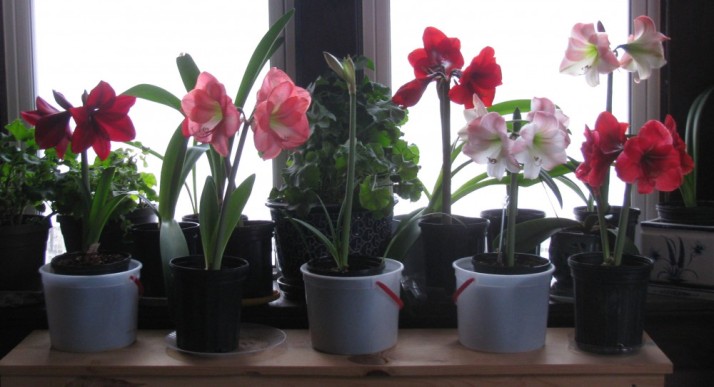
I’ll close with this picture of my beautiful flowers.

IMG_5181


The Jane Stickle Quilt, Row F

IMG_5171I’ve been working diligently on my Dear Jane blocks  and row F is now completed.


IMG_5172The first 6 rows. When I have row G (7) sewn, I’ll start a second half. When the blocks are all completed it will be easier to sew 2 halves together than to keep sewing a narrow row to a section.

IMG_5173Of course I need to keep you updated on my Amaryllis. I’ve had these bulbs for years and some of the bigger bulbs have grown baby bulbs. Sometimes these baby bulbs break off when I’m transplanting them into the flowerbeds in the spring. I plant the little bulbs and let them grow over the summer just like I do the larger bulbs. When I start potting the Amaryllis bulbs in the winter, I plant a larger pot right away with just the baby bulbs. There are 8 babies in this pot but this year one of them has bloomed! She only has 2 flowers but next year she’ll get her own pot and will have more blossoms.

There are a lot more flowers coming! I’m glad, we still have snow on the ground!

Two Finishes!

February is a short month anyway but with me being gone a week to Tempe and then 4 days to a quilt retreat, it didn’t leave a lot of time for concentrating on Dear Jane blocks so I worked on other projects.

IMG_5163I sewed the bindings on these two wallhangings. The pink/brown is the original Buck A Block project and I made the blue/brown one with my own fabrics. Tammy Payette, Three Sisters Fabric, quilted them both with a stippling design. I don’t need 2 wall quilts of the same design so IMG_5162 the pink and brown one will be donated to the Michiana Mennonite Relief Sale in September.


IMG_5165


I enjoy watching Love of Quilting on our local PBS channel. Several years ago Jo Morton was on and she demonstrated her way of making HST blocks out of 5″ charm blocks. You will get 8 blocks from 2 charm blocks, what a great idea! So two years ago at the guild retreat, I sewed a pack of charm blocks up into 2″ HST which will finish at 1-1/2″. However, they do need to be trimmed so I started trimming them. Ugh! I got tired of that fast and put them away. I’ve had them on a table in my cutting room ever since. I finally finished trimming them! I have a project in mind that needs over 2000 1-1/2″ finished HST. So far I have around 300 of them, I might reduce the size of that project.

IMG_5027This table has needed to be cleaned off for a long time! I’m working on reducing the ‘stuff’ on this card table starting with the basket in back. (The HST triangles I made by Jo Morton’s method were buried in here too)

When I finish sewing a project, I put leftover yardage away, but all smaller pieces are put into the basket until is full; well, actually it is full, running over and spilling onto the table. I cut these scraps into strips or blocks. The 1-1/2″ strips will be used for little 3″ finished 9-patch blocks.

IMG_5169The table is cleaned off and organized. I’ve cut up the fabrics in the basket and they have been placed in the correct box according to size. Since I’m only working on 2 projects this winter, this should stay neat and tidy. I’ve also decided that I am going to organize leftover fabrics after I finish each project and not accumulate them in the basket. Guess I don’t need that basket anymore then.

IMG_5170I admit I am getting tired of just 2 projects so it was nice to have a break at the guild retreat. After I finished organizing the cutting room, I got out an old project. I think I might have sewn these blocks 8 – 10 years ago, I really don’t remember how long it was. Anyway, the rows are finally sewn (diagonally) together. I do have 10 more blocks with the light color and will add them at a later time. That will make the corners kind of wonky but I think I can make it work. I still had the fabric with it for the inset triangles. I’m excited about this project. It is definitely going along to the next retreat.

Now it is time to get back on  the Dear Jane blocks but I’m going to have to increase production to two rows a month. There are a group of applique addicts in my guild. They often select the same pattern to applique but put their own individuality to it. They showed me what pattern they are considering next, Sweet Surrender by Dragonfly Studio. I thought I might join in since they won’t be starting until January 2016, but I need to get Jane pieced first!