Archive | January 2015

Star Quilt Border, Fussy Cut Friday

Selecting the fabric for the border has taken me months! I’ve looked at all the fabric stores in our area and couldn’t find that just right fabric. It has been frustrating!

One day when I was at Lolly’s checking out the civil war fabrics, a friend told me to use one of the Jinny Beyer fabrics. Well, duh, why didn’t I think of that?

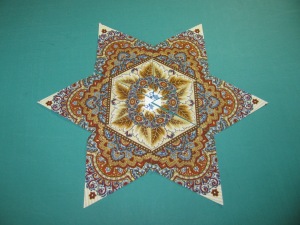
I think the prettiest fussy cut stars areIMG_5042 these purple stars made from Jinny’s Renaissance Garden line so I ordered some to be used for the border. (None of our local fabric stores carry Jinny’s border prints, you have to order it from her site.) But once the fabric was here, I wasn’t sure. It is very dark and I didn’t think the design would show from a distance. Now what?

Son 2 was here for a visit and he always asks what I am working on. I showed him my quilt center and the border fabric. He immediately said that fabric is too dark, confirmation is nice. I pointed to another of Jinny’s fabrics, a blue border print and he said “No, go with the red one.” So I did.

Here is the Star quilt with the borders. IMG_5041
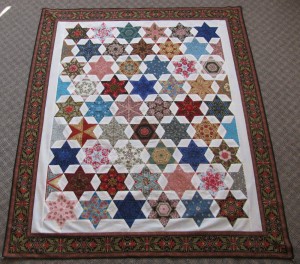
The border fabric is from the Bordering on Brilliance II line. I used some blue fabric from the same line for some of the stars also.

It is definitely hard to see the design on the purple stars, so the decision not to use that fabric is the correct one.

It feels really good to have this quilt top pieced. At this point she measures 49″ by 58″. Now the decision is how to quilt her. I think I want to hand quilt her, but haven’t decided for sure. I’ll lay her on the extra bed upstairs so I can look at my leisure and think about it.

And, for the last time, here is the link to the Temecula Quilt Company’s Fussy Cut Friday.

The Jane Stickle Quilt, Row D

Another row completed! IMG_5044

Here are the pieced blocks for Row D.


And here are the first four rows of Dear Jane.

IMG_5048Some people piece their blocks out of order. That’s fine, they can piece them in whatever order they wish but I have to see results. That is why I’m piecing my Jane’s in order and sewing the center together as I work.

Red Radiance

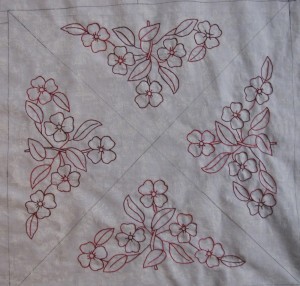
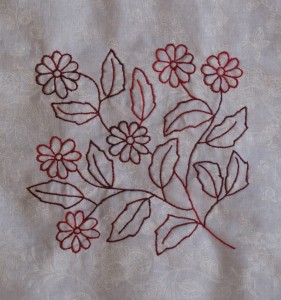
I have the inside embroidered IMG_5045sections completed and I’ve started embroidering the outside border.

I showed you the very center of the wallhanging several posts ago.

There are several parts to the inside. These are triangles that will be part of the star.


Then there are four of these IMG_5047squares.

The wallhanging will measure      48 inches square when it is completed.

Star Quilt Center, Fussy Cut Friday

I write some of the posts ahead of time and sometimes mistakes happen. You might have received a not yet completed rendition of this post in November, 2014. That was because I wrote 2014 instead of 2015. Now this post in completed and ready for you to read. Enjoy!

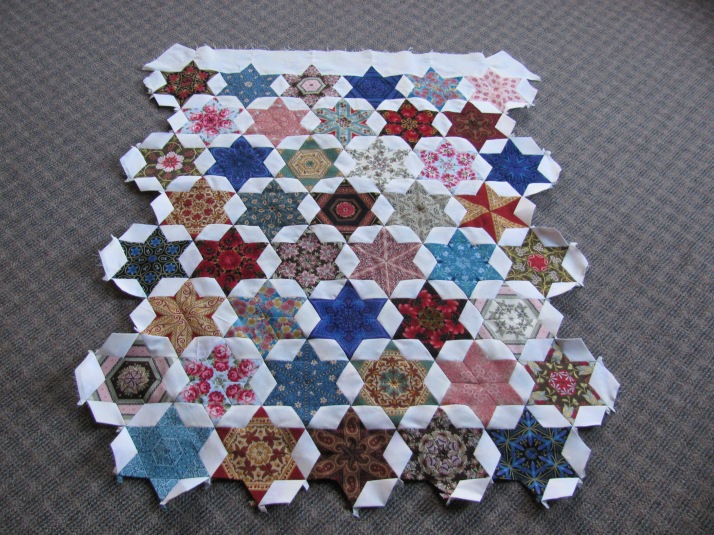
I need 3 more stars to complete the center. Two of the stars are ho-hum, but the 3rd star can be arranged in 2 different patterns; arrangement 1 . . .

IMG_4940 Arrangement 2.

IMG_4941

The final three blocks. Doesn’t the 3rd star look different? IMG_4942

The stars have been attached to the body, the paper pieces removed and the entire center has been pressed.

IMG_4944

Using a Frixion pen, I’m marking a line 1/4″ from the star points on the quilt sides.

IMG_4947

To add stability, I’m stitching the marked line. IMG_4948

The side borders have been sewn onto the center, pressed and trimmed; then the top and bottom were trimmed. IMG_4949

Now it’s ready for the final border, I’ll show you that next week.

The Jane Stickle Quilt, Row C

The blocks for row C are pieced  and attached to the body. I’m always amazed when I look at them. I’m really doing this! I’ve switched the light and dark around in some of the blocks.

IMG_5026

Someone asked me if I didn’t think I’d get tired of blue and white. I haven’t yet anyway, I think they look just as nice now as they did when I selected the fabric.

2015 Projects

I like to read other people blogs and see what projects they are working on. There are a lot of beautiful quilts being pieced. One blog I check talks about Slow Stitch Sunday, the idea being to slow down and take time to do some handwork/hand quilting. I’m taking that slowing to heart by putting a twist on it, I’m going to have a Slow Stitch winter.

While I’m working outside in the summer, I often think about the quilting projects I would like to work on during the slower winter season. I had decided last summer that I would start 4 new projects this winter. The first project was the Dear Jane quilt and you have seen the blocks I’ve completed so far. IMG_5017

The next project was a redwork embroidery wall quilt called Red Radiance from the December 2000 American Patchwork & Quilting magazine. I’ve finally traced the pattern onto my white fabric and the center block is embroidered.

The 3rd new project was the Common Bride quilt by Edyta Sitar, Laundry Basket Quilts. After closer inspection of this pattern, I’ve placed the fabric and pattern back in storage until after I’ve completed Dear Jane. Really Edyta? . . . cut strips 1 & 9/16th inch wide?

The 4th project was Summer Lake Log Cabin, designed by Judy Martin, from her Log Cabin Quilt book. This quilt isn’t difficult, but I’ve decided to concentrate on Dear Jane and the embroidery project this winter.

Sometimes though, I want to sew and not fiddle with Dear Jane blocks. Over the years I’ve started several scrappy quilts and then, for one reason or another, set them aside. I’ll chose one of them to work on as an alternate project until I’m ready to go back to piecing Dear Jane blocks.

I’m looking forward to a less stressful winter and if I want to take the time to read a book, I’m going to read a book. Who knows, I might even watch a TV program and not do any hand work!

Autumn Sampler

Sometimes it is so hard to find the right fabric for a border, then sometimes, when you aren’t even thinking about border fabric, the right one is just there. That is what happened with the Country Threads BOM project. Last fall I stopped at Calico Point one day and there was a display of fall fabrics on the front table. There it was, the perfect fabric! It just jumped off the table into my arms, cuddled up to me and whispered “Take me home, take me home!” So I did, 3 yards anyway.

I had thought all along that I wanted a full size bed quilt. The completed blocks measured 60″ by 80″. IMG_5019I thought awhile and then the border fabric spoke to me again and said “Maple Leaves”. So I made maple leaves, 14 for each side. I also added a cream and black checkerboard border. She now measures 90″ by 98″. After she is quilted, she will go on the extra bed upstairs. The border fabric doesn’t show very well in the quilt photo. IMG_5023Here is a close up of the border fabric.

This was a new experience for me. I like to see what I am doing ahead of time and I don’t normally sew blocks together in a somewhat random fashion. Anyway, the top is now completed and it’s time for a new name, Autumn Sampler. 

I’m not participating in any BOM’s this year but if you would like to participate in a monthly BOM project, Mandy at Farm Chick Quilts, has just posted the first block of the 2015 sew along.